DIY: Kelly Wearstler Inspired Lamps
/After a considerable blogging hiatus and and amazing summer vacation with my munchkins I'm refreshed, recharged and excited to share all of the projects we've been working on over the summer starting with our Kelly Wearstler inspired lamps!

Our DIY Kelly Wearstler Inspired lamp
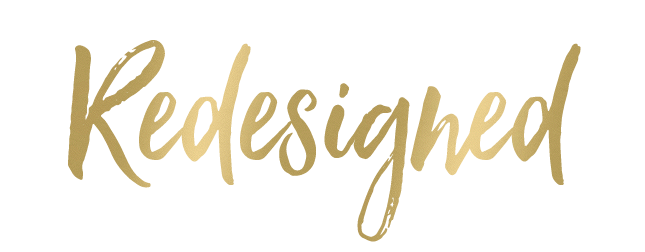
I have loved Kelly Wearstler's "Linden" lamp forever and I even pondered which organ I could live without and sell to afford just one of them. But, at the end of the day I needed two oversized lamps for our living room and these were sadly well over budget ...

Source: Blue Print Store

Source: Made by Girl

Source: G&G Interiors
I couldn't get these lamps out of my mind and thought I might be able to create a similar (in no way as amazing as the original but ok for my home) look for less. After a quick and extremely lucky trip to our Orillia Habitat for Humanity Restore I found a pair over oversized lamps with brass bases that I thought could work. At just $12 each it was worth the risk!

Habitat for Humanity Restore lamps

Habitat for Humanity Restore lamp
I was able to find most materials for this DIY at our Orillia Home Hardware including:

Step 1: Lightly sand the lamp sides until completely smooth and unable to feel any raised pattern
Step 2: Completely clean sides (soap & water) and brass base (using Barkeeper's Friend)
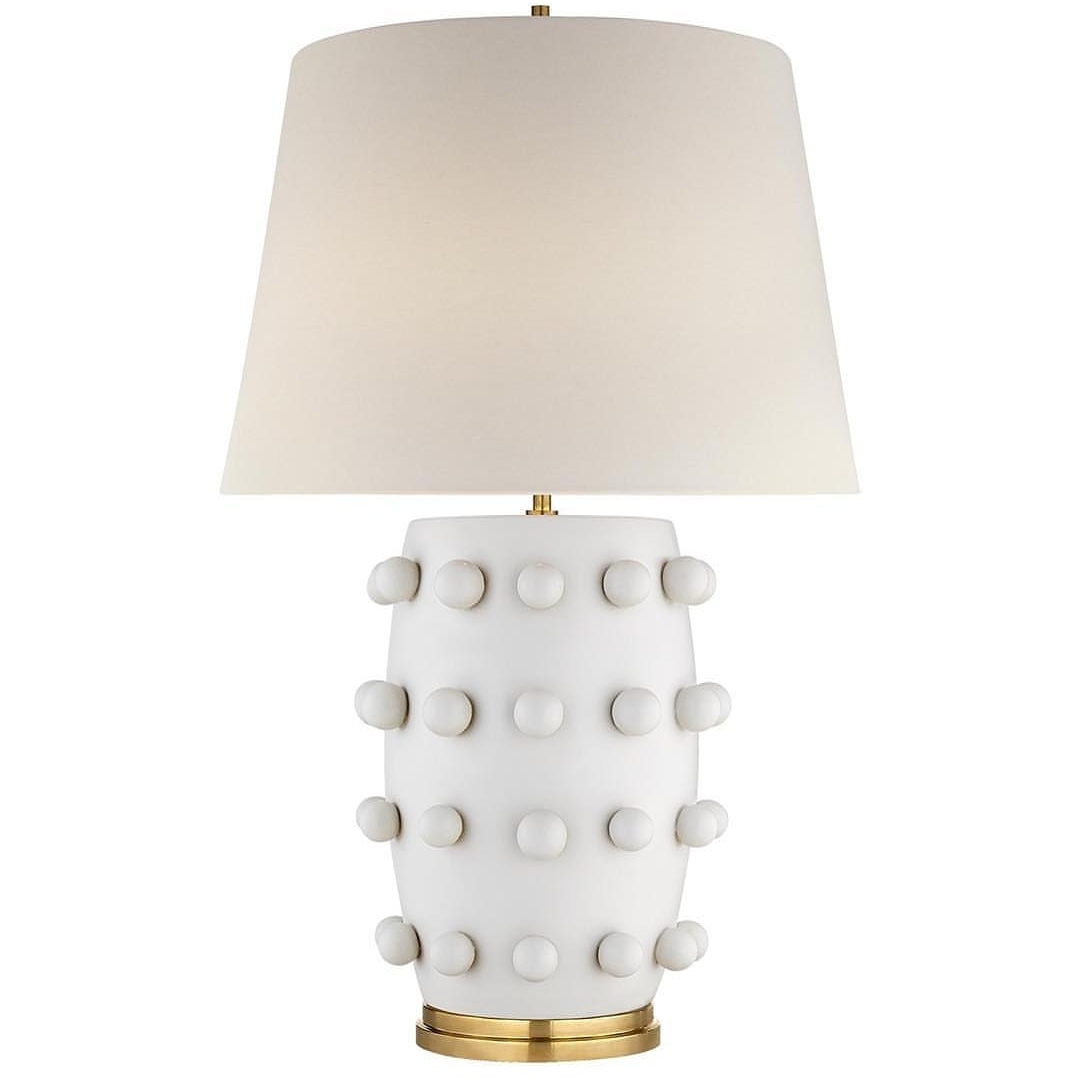
Step 3: Glue wood knobs onto lamp base using a glue gun. I placed wood knobs along the seams first and then eye-balled placement for the rest in an alternating pattern. A few fell off after a few hours so I reattached them using Gorilla Glue.


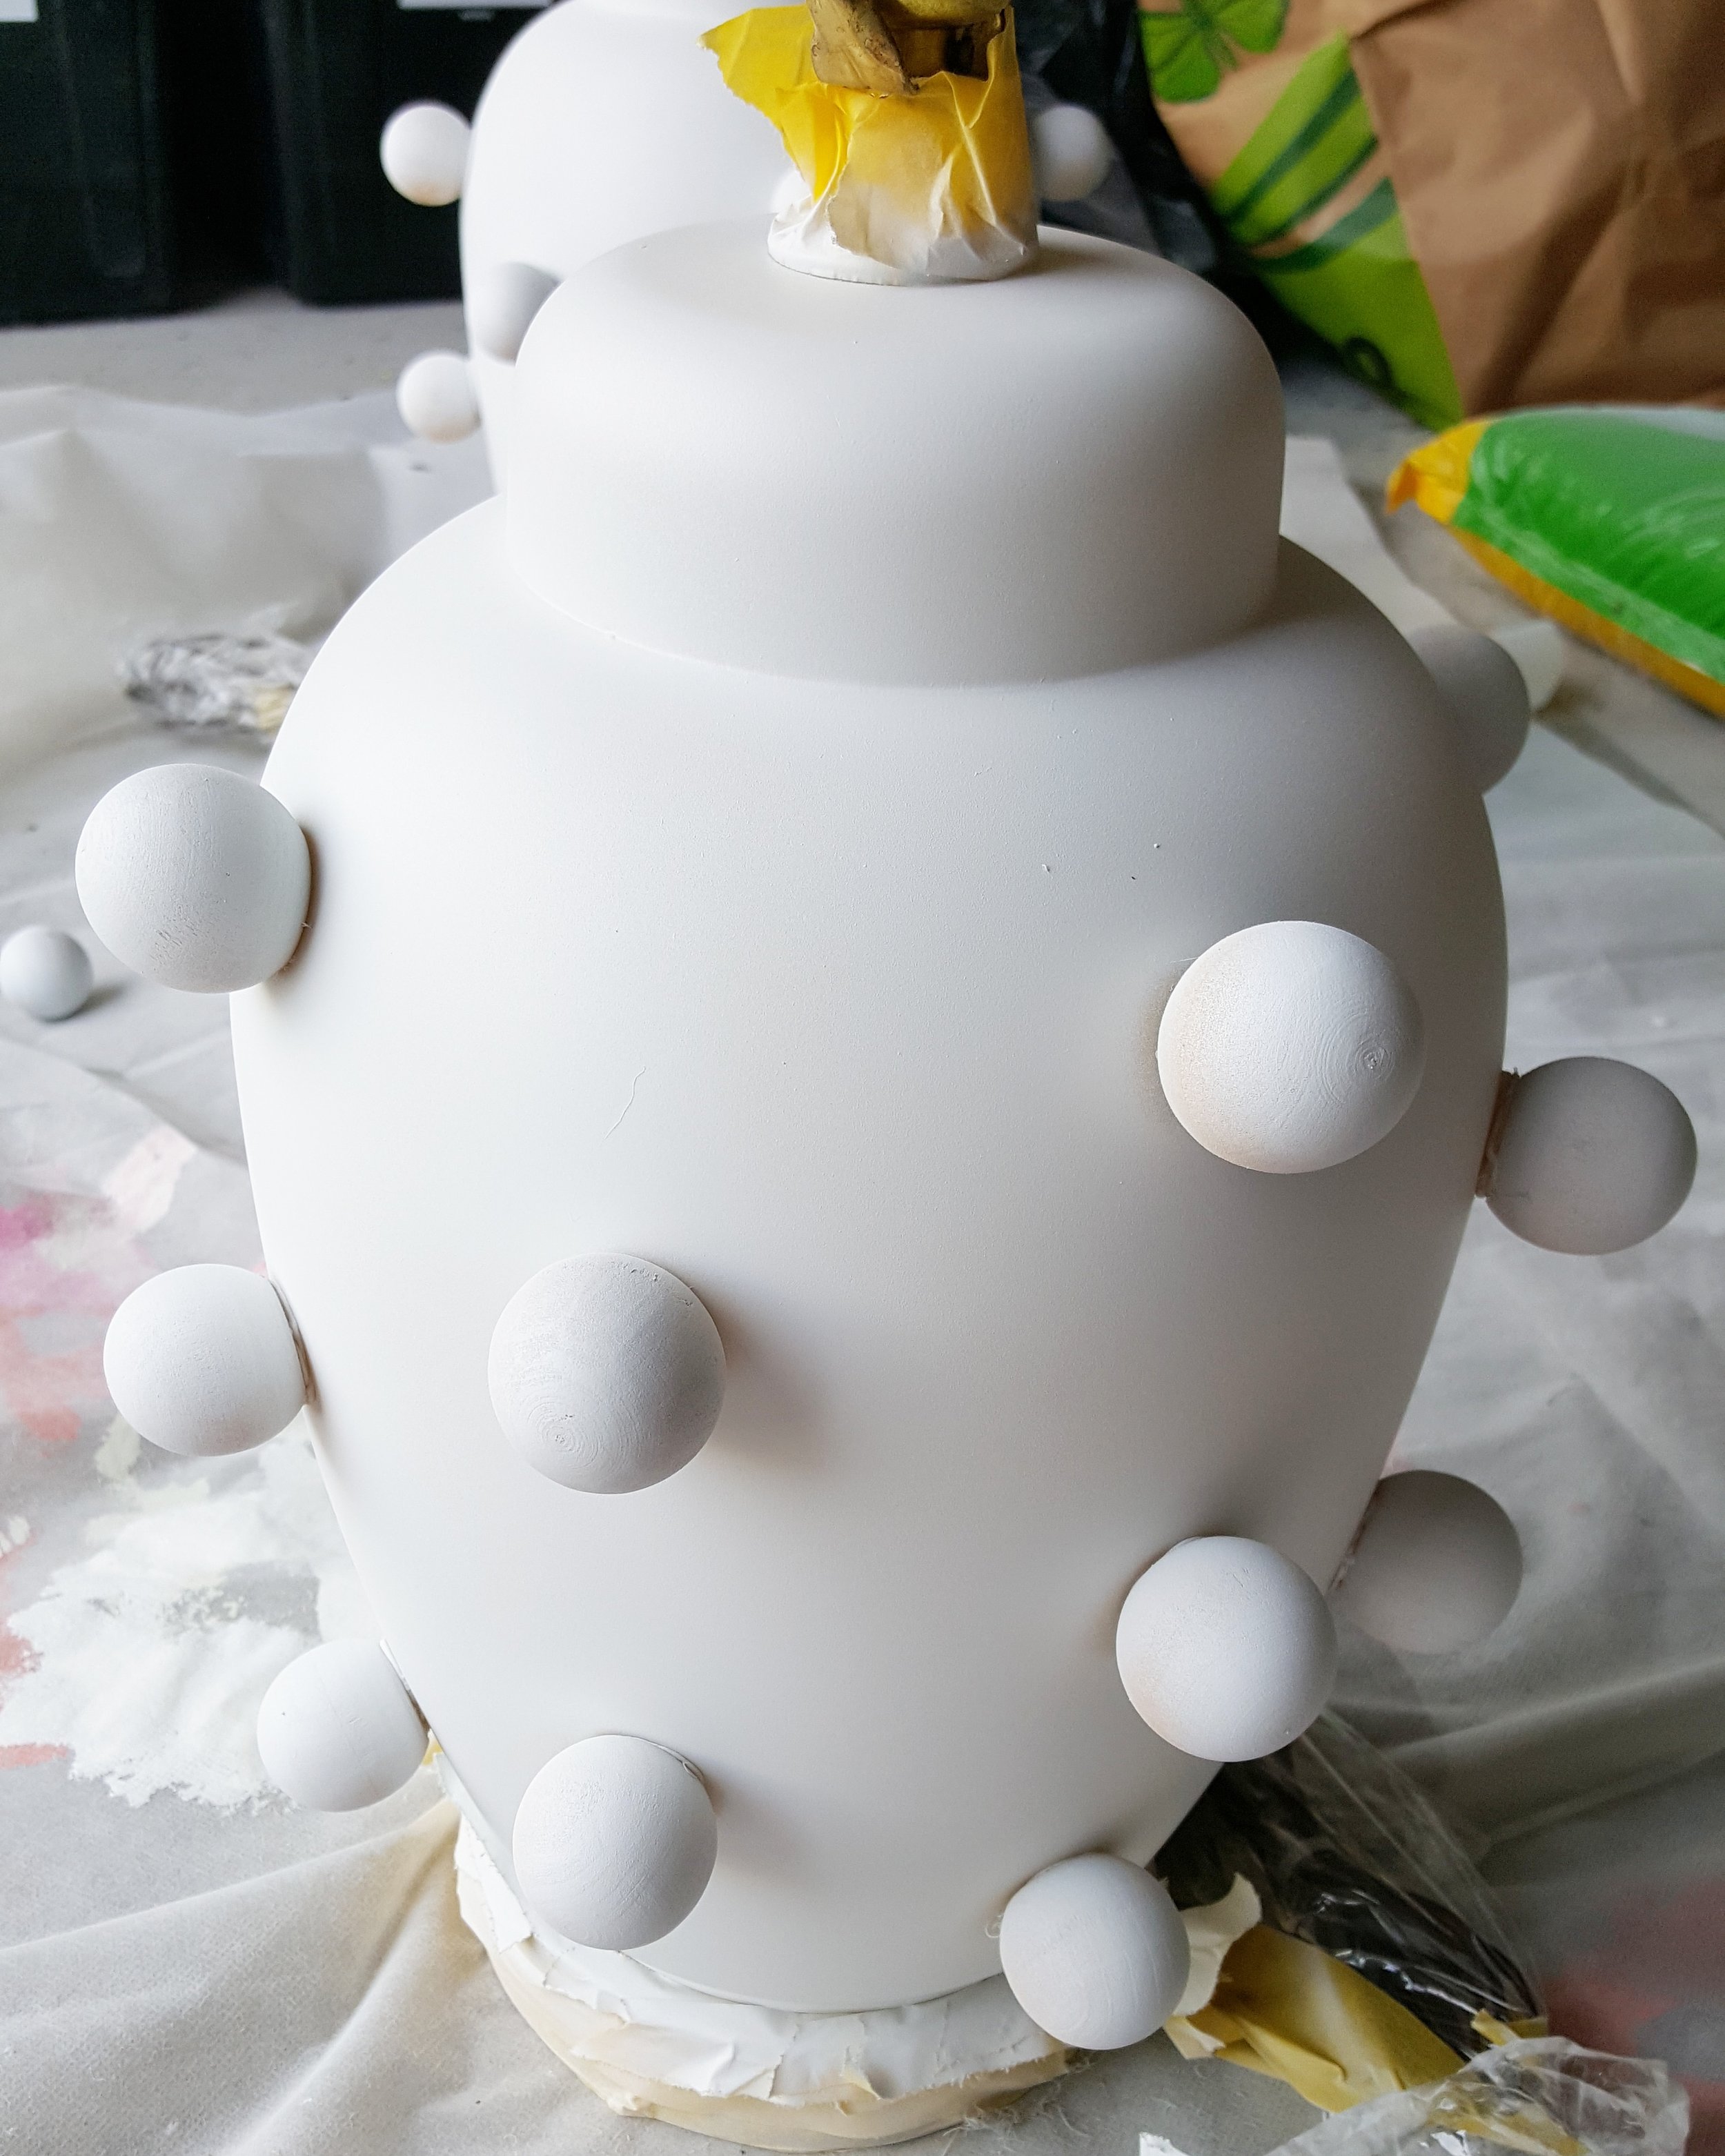
Step 4: Tape off brass bases, cords and upper hardware to protect from spray paint.

Step 5: Apply a few light coats of flat white spray paint in a well ventilated area.

Steps 6/7/8: Remove painter's tape, replace harps, add a shade and voila!

Perfectly imperfect DIY lamp!

Our new (to us) living room lamps!
While these lamps will never be as amazing as the Kelly Wearstler originals, they were an inexpensive and easy weekend project and most importantly, my daughter Lily and I were able to use our glue guns together.
- Carley